- Edyta Sitar

- Jun 14, 2023
- 3 min read
Thank you all for taking the time to come and blossom as a quilter with me.
I am SEW excited to show you our next block! It is SEW cute!

Below is all the information you need to prepare and cut your fabric before
joining me on our YouTube Channel for step by step instructions.
in all my pictures to show you the step by step.
But do not worry if you are not using this bundle, I would love to still inspire you every week,
by sharing multiple color options for the fun and simple blocks.
You can use those color options as inspiration for placement of your fabrics.

For Week 3, you will need:
(These notions are just my recommendations)
• Fabrics (4 medium pieces) and 1 light background
• Sew Daisy Fabric Markers (Use fabric markers to stay organized)
• Creative Gird Rulers: 4½" x 12½" and 6½" square
• Olfa Rotary and Blades
Edyta’s Tip: Always have a stash of fresh blades for your rotary and remember to change yours often. for the cleanest cuts.
• Sewline Fabric Pencil, Best Press, Pins, Scissors, and fresh Microtex Needles 70/10
Check out our Spring Mystery Quilt Sewing Basket on the website for all your quilting needs!
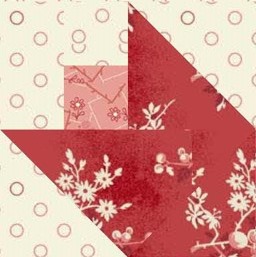
What a little surprise! This cute little blossom popped right into our quilt.

Block 3
We will be making 20 total Daisy Nine Patches.
for this Secret Garden option, I'm making
8 of fabric A
8 of fabric B
4 of fabric C
For color inspiration, scroll to the bottom of this blog.
(You can use 3-5 fabrics to create your blocks, or feel free to get scrappy with your color choices,
as long as you have 20 blocks).
This block is perfect to have some fun!
Cutting directions for 20 blocks:
• Accent Fabric: 3 - 1½" x 12½" strips
• Light Background Fabric: 10 – 1½" x 12½" strips
• Medium Fabric A: 4 - 1½" x 12½" strips
• Medium Fabric B: 4 - 1½" x 12½" strips
• Medium Fabric C: 3 - 1½" x 12½" strips
Daisy Nine Patch Block

Select and arrange 2 light strips and 1 medium strip to make your strip set .
We will be making 2 strip sets for fabric A & B, and 1 strip set for fabric C.

Sew 2 light strips and 1 medium strip together.
Press seams towards the medium strip.

Select and arrange 2 medium strips and 1 accent strip to make your second strip set.
We will be making 1 strip set for fabric A, B, and C.

Pin and sew your strips together. Press towards the outside strips to complete one strip set.

From your strip sets, cut 1 ½" sections.

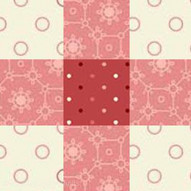
Arrange sections as shown above.

Sew together. Press towards the center.

Repeat steps for a total of 20 Daisy Nine Patch Blocks (8 in fabric A, 8 in fabric B, 4 in fabric C).
Watch our YouTube Channel for this block’s step-by-step
instructions and tips on how to make this project.
INSPIRING COLOR OPTIONS


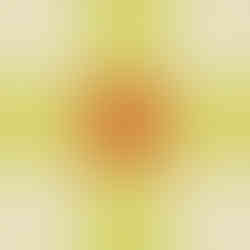


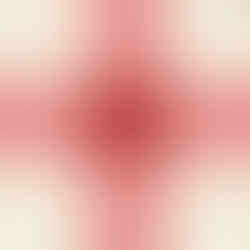


These are just a few of our fabric options- I can't wait to see what you create!
Happy Quilting!
Edyta
Please remember to share your progress photos to Instagram and Facebook!
Tag us @laundrybasketquilts and #summermysteryquilt2022.