top of page

BLOG

For the last few weeks we have been wondering around; hiking and climbing,

looking at the sun and getting lost in the nature of scraps.

I am sew thankful to have gone on this adventure with you!

Are you ready to unveil our mystery?


Set your eyes on the sunset of scraps, the bubblegum pinks, and the sunset clouds!

Below is all the information you need to prepare and cut your fabric for this week.


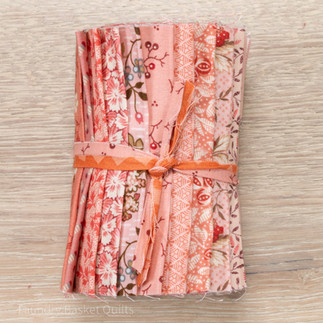
I will be using the Sunset Pink, Snowcap White and River Blue rolls.


But do not worry if you are not using these bundles,

I would love to still inspire you every week.

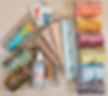
For Week 6, you will need:

(These notions are just my recommendations)

Fabrics

Sew Daisy Fabric Markers (Use fabric markers to stay organized)

• Creative Gird Ruler: 4½" x 12½"

• Aurifil Thread – 2370 recommended

Edyta’s Tip: Always have a stash of fresh blades for your rotary and remember to change yours often. for the cleanest cuts.

Check out our Mystery Quilt 2024 Sewing Basket on the website for all your quilting needs!


Let's watch the sunset together!

The Sunset

9½" x 58½" unfinished


Note from Edyta: Feel free to use the image above for fabric placement inspiration!


Cutting Directions:

Cut in a variety of sunset colors:

  13 A - 2" light squares

  52 B - half-square triangles cut from 26 squares 2" in blue

   2 C - 3½" x 11" rectangles

   2 D - 3½" x 9" rectangles

   2 E - 3½" x 11½" rectangles

   1 F - 3½" x 6½" rectangle

  1 G - 3½" x 8½" rectangle

  1 H- 3½" x 12½" rectangle

  2 I - 3½" x 9½" rectangles

  1 J - 3½" x 15½" rectangle

  1 K - 3½" x 10" rectangle

  1 L - 3½" x 7" rectangle


For tips on this block, watch our Week 6 Tutorial Video.


Block Assembly

To make a cloud unit, select four B 2" half-square triangles and one A - 2" square.


Place triangles right sides together with the square on opposite sides and sew together as shown above.


Sew the remaining two triangles and press. Make 13 cloud units.


Arrange cloud and sunset strips into 3 rows as shown above.

(4 clouds top and middle row and 5 clouds bottom row)


Sew into rows and press towards the strips.


Sew rows together and press.


I'm on cloud nine! We just finished our final row. Now let's put our quilt top together!


Quilt Top Assembly

Arrange all your rows as shown above.

Sew rows together and press.


Quilt size is 58½" x 68"


What a wonderful keepsake from our travels together! Let this quilt be a reminder to you of all that is simply beautiful in life. I cannot thank you enough for going on this wonderful journey with me.

I will cherish this quilt and our adventure forever.


Now all we have to do is add our binding as shown above in the picture!

I am using fabric A-606-N.

Click here to download a PDF copy of Mystery Quilt 2024 - Week 6.


Happy Quilting!

Edyta


Please remember to share your progress photos to Instagram and Facebook!

Come on this adventure with me through fields of fabric and let's learn and play together. I am sew thankful to have you with me on this journey!

Let's unveil another piece of this mystery together.


You made it up the mountain, just as the sun begins to dip.

Below is all the information you need to prepare and cut your fabric for this week.


I will be using the Sunshine Yellow Roll.


But do not worry if you are not using this bundle,

I would love to still inspire you every week.

For Week 5, you will need:

(These notions are just my recommendations)

Fabrics

Sew Daisy Fabric Markers (Use fabric markers to stay organized)

• Creative Gird Ruler: 4½" x 12½"

• Aurifil Thread – 2370 recommended

Edyta’s Tip: Always have a stash of fresh blades for your rotary and remember to change yours often. for the cleanest cuts.

Check out our Mystery Quilt 2024 Sewing Basket on the website for all your quilting needs!


Let the sun rays shine on your face in this golden hour.


The Sun

10" x 10" finished


Note from Edyta: Feel free to use the image above for fabric placement inspiration!


Cutting Directions:

Cut in a variety of sun colors:

 Cut 20 - Template A (Paper, Creative Grids® 18 Degree Dresden Plate Quilt Ruler, or Sun Ray Acrylic Template) from 4¾" x 2½"

Block Assembly

Fold your pieces in half, right sides together. Straight stitch the top and the bottom. Turn the piece right side up, center top and bottom and press to create a unit shown in the picture above on the right side to create a ray unit.


For tips on this block, watch our Week 5 Tutorial Video.


Sew each ray unit into four sets of 5 as shown above by placing them right sides together and stitching them and pressing the seam allowance open.


Arrange 4 quarter units.


Sew quarter units into halves.


Sew halves together.


Arrange and appliqué to your mountain-scape.

This is a fun time to try machine or hand appliqué.


Golden hour is one of the prettiest hours of the day! Bask in your hard work and its shining outcome.

I'm daydreaming already about next week.


Click here to download a PDF copy of Mystery Quilt 2024 - Week 5.


Happy Quilting!

Edyta


Please remember to share your progress photos to Instagram and Facebook!

Come on this adventure with me through fields of fabric and let's hike through a mountain of scraps. I am sew thankful to have you with me on this journey!

Let's unveil more of this mystery together!


Today we have a gorgeous mountain hike to take.

Below is all the information you need to prepare and cut your fabric for this week.


I will be using the Mountain Purple, Meadow Green, and Black Granite Rolls


But do not worry if you are not using these bundles,

I would love to still inspire you every week.

For Week 4, you will need:

(These notions are just my recommendations)

Fabrics

Sew Daisy Fabric Markers (Use fabric markers to stay organized)

• Creative Gird Ruler: 4½" x 12½"

• Aurifil Thread – 2370 recommended

Edyta’s Tip: Always have a stash of fresh blades for your rotary and remember to change yours often. for the cleanest cuts.

Check out our Mystery Quilt 2024 Sewing Basket on the website for all your quilting needs!


The majestic mountains are a sight to behold!


The Mountains

20½" x 58½" unfinished


Cutting Directions:

Cut in a variety of mountain range colors:

  157 - half-square triangles cut from 79 squares 2" in shades of purples and blacks

   128 - half-square triangles cut from 64 squares 2" in shades of greens, teal and gold.

Cut background sky fabric: (A-9772-B)

  5 A - half-square triangles cut from 3 squares 6"

  3 B - half-square triangles cut from 2 squares 4"

  1 C - 2½" x 4½" rectangle

  1 D - 2½" x 10½" rectangle

   2 E - half-square triangles cut from 1 square 8"

  1 F - 4½" x 20½" rectangle

  1 G - 8½" x 38½" rectangle


Block Assembly

Select two 2" half-square triangles in your mountain colors.


Sew together. Make 128.

Unit size: 2½" Square


Next, we will arrange all our triangles following the full row layout. Then, sew into sections as shown above. There will be multiple sections shown in the following steps. Picture above is just an example of the first section.


Sew triangles together into columns, add background pieces and press.


For tips on this block and assembly, watch our Week 4 YouTube tutorial video.


Assemble your columns, then arrange them as shown above with sky rectangles and half-square triangles.


Sew sky HSTs to mountain stacks.


Continue to combine by adding rectangles.


Sew into sections.


Combine sections into two.


Sew together and press.


Wow! You made it onto the top of this mountain taking one little triangle at a time!

It feels so good to look back and see how far we have come.

I love that at the top of the mountain you can feel the warmth of the sun.

Can't wait to see you next week!


Click here to download a PDF copy of Mystery Quilt 2024 - Week 4.


Happy Quilting!

Edyta


Please remember to share your progress photos to Instagram and Facebook!

bottom of page