
- Edyta
- Apr 5, 2020
- 3 min read
Updated: Jun 23, 2021
I hope you had the most wonderful weekend, relaxing and enjoying a little bit of sewing!

Maybe you had a chance to catch up and finish your blocks from our mystery quilt.
I am still amazed how quickly our 15 days of sewing passed by! We took this beautiful bundle of Super Bloom fabric and turned it into…

a bundle of blocks!
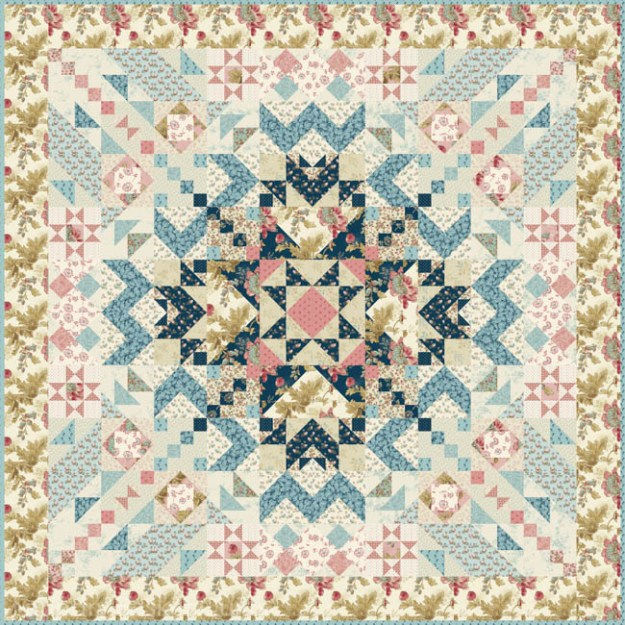
The name of this Mystery Quilt is called “California” and the pattern is now available on our website.

The next step in our journey is to sew our blocks into rows, then sew rows together. Don’t forget to push the seam allowances in opposite directions to lock your seams!
Once your quilt center is assembled, you will probably want to add some borders! I have a few ideas for you.

You can take two 5″ x 60-1/2″ strips and sew them to the top and bottom of the quilt, then take two 5″ x 69-1/2″ strips and add them to the left and right sides of the quilt.
This is the simplest option and makes your completed quilt 69-1/2″ x 69-1/2″.
You need 1 yard for border , cut 7 strips – 5″ x WOF, sew them together end to end and section them for your border lengths listed above. I used “A-9454-L” fabric from our “Super Bloom” collection

Once you’ve completed your border, quilt and add binding! (I bound my quilt with A-9456-B blue fabric.)
The same size border with a large light floral print might be more your style! Image above shows my favorite light fabric from Super Bloom. (A-9446-L)

Or maybe you’d like a dark blue border (A-9446-B) I find it amazing how the border compliments and add elegance to the quilt!

If you would like your quilt to be a little bit larger, you can add a few inner borders and a larger outer border. (You will need additional fabric for this option.)

This pieced border is absolutely beautiful and can be made with your leftover scraps! I added a 2-1/2″ strip of A-9452-L around the quilt as an inner border before adding the pieced strips around the outside of the quilt.
The dark strips are 1-1/2″ wide with varying length. I started the strip length at 1-1/2″ and grew to 5-1/2″ in 1″ increments. The light strips are the same measurements but pieced with the opposite length strip to create this 6-1/2″ total width border. (i.e 5-1/2″ dark strip with 1-1/2″ light strip, etc.)

Finally, maybe you’re like me and like applique! For this option I took 4 packages of our Super Bloom Silhouettes and followed the layout from the “California” quilt pattern.
Each border can be appliqued individually, then sewn into the quilt. These borders are 10-1/2″ x 70-1/2″ and make the finished quilt 80-1/2″ x 80-1/2″. (You’ll need 2 yards of A-9452-L for these borders, cut these lengthwise from fabric)
I hope these give you some fun ideas for your borders!

Whether your quilt is in blue…
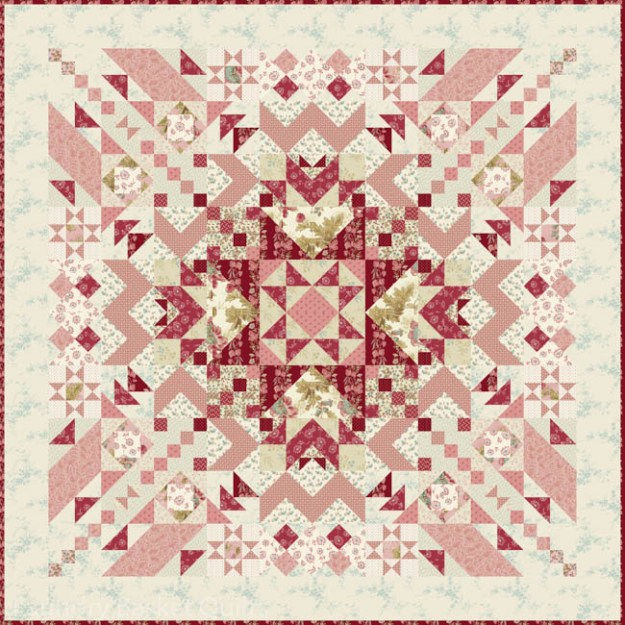
…or rosy in reds…

…I am so thankful for the time that we shared together!

Time for my next project – Super Bloom, I hope you join me! We will be making this one over the next nine months.
Our BOM has sold out, but we have the Super Bloom pattern as well as a few Pre-Cut kits available if you’d like to participate.
Happy Quilting! Edyta


