- Edyta Sitar
- Jul 4, 2023
- 4 min read
Look how much you've grown as a quilter this spring!
Let us wander through this garden of fabrics we've stitched together for this mysterious pattern.
See how your skills and techniques have blossomed over this quilting journey.
It's time to unveil this mystery together!
Let's build something beautiful with our blocks.
I am SEW proud of you!

Below is all the information you need to prepare and cut your fabric before
joining me on our YouTube Channel for step by step instructions.
(Make sure you read through all of the instructions before you begin!)
in all my pictures to show you the step by step.
But do not worry if you are not using this bundle, I would love to still inspire you every week,
by sharing multiple color options for the fun and simple blocks.
You can use those color options as inspiration for placement of your fabrics.

For Week 6, you will need:
(These notions are just my recommendations)
• Fabrics (1 light background fabric)
• For Appliqué , you can use your leftover fabric or 2 packages of Appliqué Silhouettes that match your fabrics (Green Thumb, Sweet Sixteen, Perfect Union)
• Sew Daisy Fabric Markers (Use fabric markers to stay organized)
• Creative Gird Rulers: 4½" x 12½" and 6½" square
• Olfa Rotary and Blades
Edyta’s Tip: Always have a stash of fresh blades for your rotary and remember to change yours often for the cleanest cuts.
• Sewline Fabric Pencil, Best Press, Pins, Scissors, and fresh Microtex Needles 70/10
• Hand sewing needles
• Sewline Fabric Glue Pencil
Check out our Spring Mystery Quilt Sewing Basket on the website for all your quilting needs!
Let's do some landscaping with our background fabric!

Block 6
Background Lights
We will be making a total of 4 sections
for our quilt.
Cutting Directions:

Cutting directions for 4 sections of Background fabrics and Center Square:
• A: 4 - 2½" x 8½" rectangles
• B: 4 - 6" x 8½" rectangles
• C: 4 - 3" x 7½" rectangles
• D: 8 - 3½" x 4½" rectangles
• E: 4 - 6" x 9" rectangles
• F: 4 - 3" x 25" rectangles
• G: 4 - 3" x 3½" rectangles
• H: 12 - 1½" x 4½" rectangles
• I: 4 - 3½" x 11½" rectangles
• J: 4 - 4½" x 7½" rectangles • K: 4 - 4½" squares
• L: 4 - 2½" x 3½" rectangles
• M: 4 - 3½" x 13" rectangles
• N: 4 - 3½" x 25½" rectangles
• O: 4 - 3½" x 9½" rectangles
Center Square: 1 - 3" square
Now when all of the pieces are cut, you can layer your whole quarter section of the quilt, including your blocks, and start sewing together. Remember, do one section at a time.
Just like in a garden, one patch at a time. If you would like to, you can try a different order of assembly just to see what works best for you. In the end, it is your garden. :)
Quilt Quarter Section Assembly
For color placement, follow the final color inspiration quilt. Review all instructions before beginning.

To build your first quarter section, begin with: Unit 1: 1- Small Leaf
1- Big Leaf
3- Blue Bell Blocks
1- Daisy Nine Patch
Background Fabrics: A, I, J, K, L, and 3 Hs

Sew together in columns shown above.

Sew columns together.

Unit 2-
2- Daisy Nine Patch
Background Fabrics: C and 2 Ds

Sew into rows, and sew rows together.

Now combine your first 2 units with a Diamond Peony block.
Sew units together.
Wow! Your garden patch is already looking so beautiful!

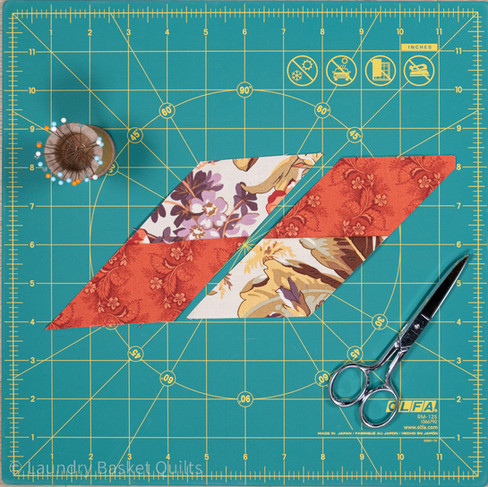
Before we proceed with sewing your remaining blocks and units together, we are going to applique our Grandmother's flowers to piece E, B and Peony section together as shown below.

Center up your Grandmother's garden flower onto your background. Then using either a machine applique technique with a small zig-zag stitch, cotton thread in your bobbin and nylon invisible thread in the top, or use hand applique technique using a slip stitch and cotton thread to secure the flower in place.

Cut your background and remove your english paper pieces.
Watch our YouTube video for detailed instructions.

Arrange and applique 3 - Grandmother's Flowers
2- Daisy Nine Patch
Background Fabrics: M, O, E, G, and B
Sew units together.

Add background lights F, then N.

Press to prepare for appliqué.
Unfinished Quarter Section size: 26" x 28"
Using appliqué shapes, appliqué layout (link below), and your favorite applique technique (link below),
add your appliqué shapes to each quarter section of the quilt before proceeding with next steps.
Please notice I saved 1 leaf and 1 berry from each quarter section to apply to my quilt top later on.

We will be making a total of 4 sections.
Note: The list below is just a suggestion. Feel free to get creative with your applique shapes and add as many leaves and berries as you desire!
If you are using appliqué silhouettes, 1 package is enough for 2 sections of the quilt.
The is the perfect opportunity to try a new appliqué technique!
To complete the appliqué layout provided for each quarter section of the quilt, you will need:
Large Leaf - 4
Medium Leaf - 4
Small Leaf - 7
Stems - 6
Large Berries - 1
Medium Berries - 4
Small Berries - 7
Links:
Quilt Assembly

Start by laying out your four sections and rotating them around the center 3" square.
Sew the center square to the top left section using a partial seam on the left.

Sew left and right quilt top sections together.

Add bottom right section

Finish assembly by sewing left bottom section on right side and finishing with a seam on the top, between the top left section and the partial seam from the center square. Next, add four remaining leaves and four remaining berries on to your quilt top.
Quilt Top size: 53½" x 53½"
Watch our YouTube Channel for step-by-step instructions.
Congratulations, now you can sit back and enjoy your beautiful quilt garden!
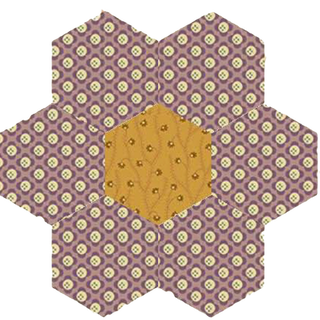
INSPIRING COLOR OPTIONS


And what about one more garden, just in time for Fourth of July!

These are just a few of our fabric options- I can't wait to see what you create!
Make sure to tune into our Live Show on Friday for more tips on machine quilting and binding.
Thank you to everyone for joining us for our Spring Mystery 2023!
May you enjoy your garden for many years to come.
Happy Quilting!
Edyta
Please remember to share your progress photos to Instagram and Facebook!
Tag us @laundrybasketquilts and #springmystery2023